
Conference Registration Best Practices: What to Collect and How to Set It Up
Conference registration is more than a sign-up form. How you structure ticket types, what data you collect, how you manage session capacity, and how clean your data is before event day determine how smoothly everything else runs. This guide covers what experienced event teams do differently.
May 6, 2026
Conference registration is the first operational decision your attendees make — and the first operational data your team depends on. How you structure ticket types, what you collect, how you manage session capacity, and how clean your data is on event day determines how smoothly everything else runs: badge printing, check-in, session room staffing, catering, sponsor reporting, and post-event follow-up.
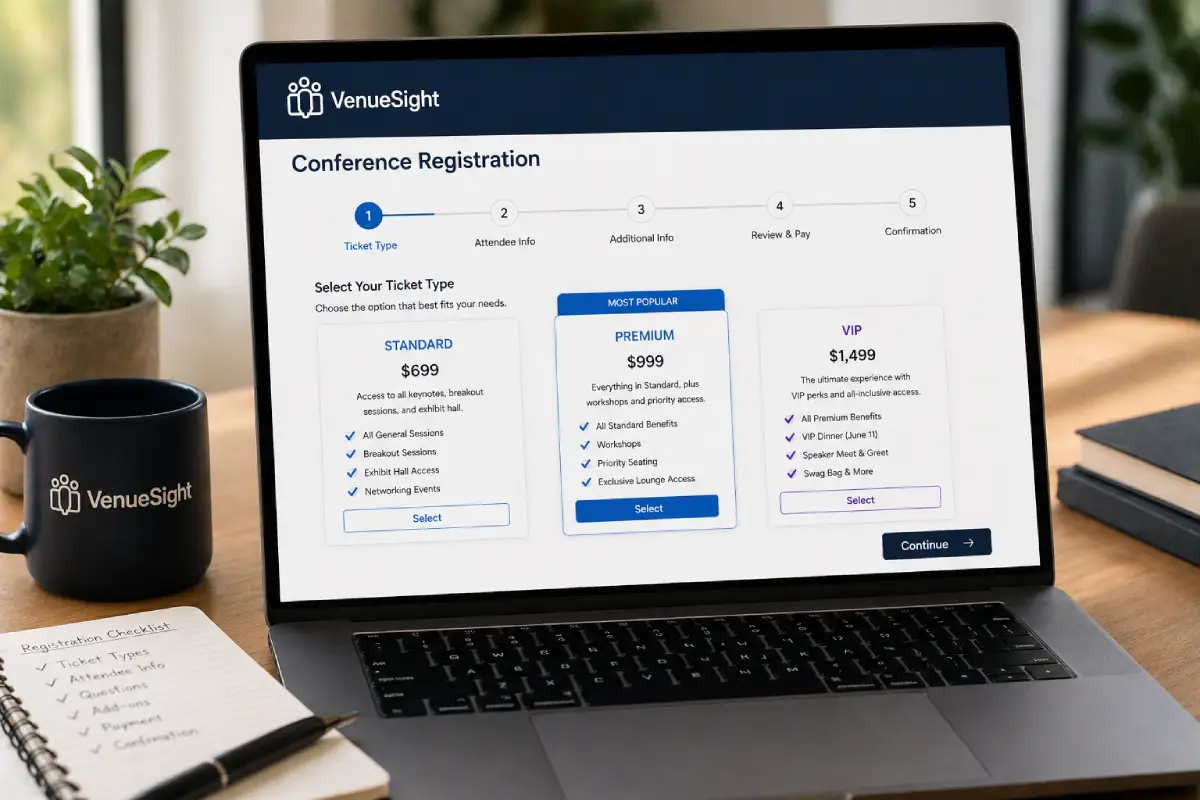
This guide covers the registration decisions that experienced event teams get right before the first ticket sells — and the common mistakes that create operational problems that can't be fixed after the fact.
Define Your Ticket Types Before Building Your Form
The most common conference registration mistake is building a form before settling on ticket type logic. Your ticket types determine your pricing structure, your access control rules, your badge design requirements, and your session capacity management. Starting with the form and retrofitting ticket types is backward.
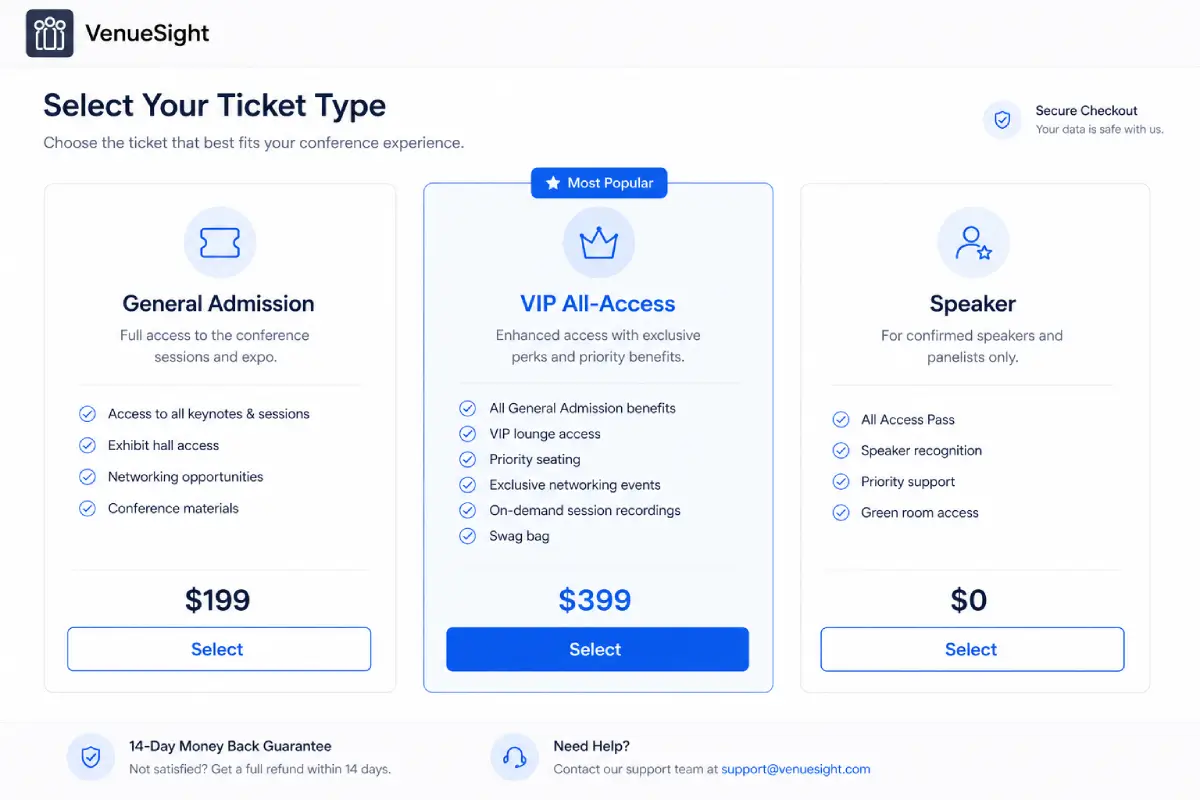
Match ticket types to access levels, not just pricing
A "VIP" ticket that costs more but provides the same access as a standard ticket confuses attendees and creates support overhead. Every ticket type should correspond to a meaningful access difference:
- Different sessions accessible
- Different badge design or color indicating level
- Different check-in lane or process
- Different included materials or swag
- Different access to spaces (speaker lounge, sponsor suite, networking breakfast)
If two ticket types are genuinely identical in access, consolidate them. Price differentiation without access differentiation belongs in a promo code, not a ticket type.
Anticipate your access control requirements before finalizing types
Will certain sessions require specific ticket levels? Do sponsors get backstage or green room access? Will you scan tickets at session room doors during the conference? Each of these requires that your ticket type logic be built into registration before the event — not added as a workaround onsite.
If you discover during setup that your check-in system has no way to differentiate between a General and a VIP badge because you used the same ticket type for both at different price points, you can't fix that at the registration desk.
Limit ticket type proliferation
Conferences with 12 publicly listed ticket types create attendee confusion and registration support overhead. Most conferences can cover their full segmentation with 3–5 types:
- General Admission — standard conference access
- VIP or All-Access — extended access, premium sessions, exclusive areas
- Speaker — complimentary or discounted, usually invite-only
- Exhibitor Staff — connected to an exhibitor account, different badge and access
- Complimentary or Staff — internal team, press, or guests
Pricing exceptions, early-bird rates, partner discounts, and group pricing should be handled through promo codes or invite-only registration links — not additional publicly listed ticket types.
What to Collect at Registration — and What Not To
Registration forms have two competing pressures: collect enough data to run your event operationally, and keep the form short enough that attendees complete it without abandoning partway through. The resolution is collecting the right data, not all data.
The minimum required for smooth operations
- First and last name — for badge printing, check-in lookup, and attendee directory
- Email address — for confirmation, QR code delivery, pre-event communication, and post-event follow-up
- Ticket type or registration category — if not already determined by their selection path
- Company name and job title — if badges display this information or you produce an attendee directory
These four data points are required for nearly every conference operational workflow. Everything else is optional in the strict sense.
Fields that serve a clear operational purpose
- Dietary restrictions — if you're providing meals, catering, or snacks at the event; only useful if catering can actually act on the information
- T-shirt size — only if you're distributing a conference-branded item that requires it
- Session selections — if sessions have limited capacity requiring pre-registration (see section below)
- Emergency contact — for multi-day conferences, particularly residential or outdoor programs
- Accessibility or accommodation requirements — so you can staff and prepare for actual needs; this field should be free-text, not a checklist
Fields that don't belong in registration
- "What topics are you most interested in?" — attendee interests shift; collecting this at registration creates stale data; survey this post-event instead
- "How did you hear about us?" — useful marketing attribution data but not operationally necessary; add to the post-event survey or as an optional field
- "What are your goals for attending?" — engagement data that belongs in post-event reflection, not pre-event administration
The test for every field: will we use this data before or during the event to make an operational decision? If not, it belongs somewhere else.
Registration Form Design Principles
Multi-step vs. single-page
Multi-step forms (Step 1: contact details → Step 2: ticket selection → Step 3: session preferences → Step 4: payment) reduce the perceived length of the form and allow progress-saving. Single-page forms are faster for attendees who are ready to complete in one sitting but feel overwhelming for forms with 10+ fields.
For conferences with complex registration (multiple ticket types, session selection, group options), multi-step is generally better. For simpler events, single-page checkout converts better.
Required vs. optional fields
Every required field is a potential abandonment point. Only require fields you genuinely can't operate without. Fields that are useful but not essential — company website, LinkedIn profile URL, accommodation preferences — should be optional.
Show required field indicators clearly at the start of the form, not as error messages after a failed submission attempt.
Mobile optimization
Confirm that your registration form works correctly on mobile before you launch it. A significant portion of attendees will register from a phone, particularly if you drive registrations from email campaigns or social media. Common mobile registration failures: fields that don't trigger the correct keyboard (numeric keyboard for a phone number field, email keyboard for an email field), payment forms that don't work with Apple Pay or Google Pay, and steps that require horizontal scrolling.
Test the full flow before opening registrations
Before your registration link goes live, complete a full test registration using a personal email address, use a test payment (most platforms support test mode), and verify that:
- The confirmation email sends immediately with correct information
- The QR code is included and scannable
- The ticket details are accurate
- Any session selections are confirmed
Discovering that confirmation emails aren't sending after 200 people have registered is a recoverable problem only with significant effort.
Session Registration and Capacity Management
If your conference includes sessions with limited seating, how you handle session registration within the main registration flow significantly affects your day-of operations.
Why pre-registration matters for limited sessions
When attendees select sessions at registration, they have a reserved seat. This allows you to:
- Print session selections on badges so staff can verify access without scanning
- Staff and configure rooms based on expected counts, not guesses
- Send targeted pre-session communication to registered attendees
- Manage a waitlist when capacity is reached
Walk-in, first-come-first-served session management works fine for unlimited sessions. For sessions with a capacity limit, it consistently produces the worst possible outcome: 250 people wanting a room that holds 80, with no fair system for who gets in, and attendees who came specifically for that session left out.
Enforce capacity at registration, not at the room door
If your registration system allows unlimited session sign-ups and you discover conflicts at check-in, you have a problem you cannot solve gracefully on event day. Capacity enforcement at registration — sold-out indicators, waitlist captures, alternate session suggestions — is dramatically better than telling someone at the session room door that they can't enter.
Most registration systems allow per-session capacity caps. Set these to a number slightly below the actual room capacity to preserve buffer for VIP additions, press, and the speakers' own staff.
Allow session changes before a cutoff date
Attendees' schedules change. A session change window (open until 2–3 weeks before the event) reduces no-shows in popular sessions and gives waitlisted attendees a chance to claim released seats. Close session changes far enough in advance that your room configuration and session-specific communications reflect final enrollment counts.
Session-only registration for high-demand tracks
If one track consistently oversells, consider a separate, limited-seat registration process for that track — either as an add-on purchase (workshop fee) or as a separate invite-only application. This separates demand management from general conference registration and allows you to create a structured waitlist and selection process without complicating the main registration flow.
Promo Codes, Discounts, and Group Registration
Promo codes are the right mechanism for pricing exceptions
Speaker discounts, sponsor comps, early-bird pricing, partner organization discounts, and staff registrations should all flow through promo codes or invite-only registration links — not through publicly listed ticket types that anyone can select. Every pricing exception that exists as a public ticket type creates a potential for misuse and complicates your reporting.
Build every promo code with usage limits:
Conference Registration
Registration that feeds check-in, badges and reporting
Custom forms, group bookings, discounts and invoicing, with every registrant flowing straight into check-in and reporting.
- Maximum number of uses (a speaker discount code with no cap can be forwarded to 500 people)
- Expiration date (an early-bird code that works through event day undermines your pricing strategy)
- Specific discount amount, percentage, or ticket type mapping
Group registration deserves dedicated handling
Companies sending 10, 25, or 50 attendees need a different workflow than individual registrations. Group registration typically involves a single purchaser, multiple attendee profiles submitted later, and centralized billing. If your event regularly attracts corporate group attendees, your registration system should handle this workflow directly — not require 50 individual registrations with 50 payment transactions.
Effective group registration handles:
- Single payment for a block of seats
- Primary contact manages attendee list (submitting individual names and emails)
- Individual confirmation emails sent to each named registrant
- Mechanism for the group organizer to substitute attendees before the event
Without proper group registration handling, group purchasers work around the system by registering under their own name multiple times or submitting a spreadsheet separately — both create data problems.
Confirmation Emails and QR Code Delivery
The confirmation email is operational infrastructure
It's not just an acknowledgment — it's the document your attendees use to check in. At minimum, the confirmation email should include:
- Event name, date, and location
- Ticket type confirmation
- The attendee's unique QR code as an inline image (not a link that requires a separate step)
- Instructions for accessing the QR code if the email isn't available onsite (event app, registration lookup page)
- Session selections (if applicable)
- Any pre-event instructions (what to bring, parking, check-in timing)
QR code as inline image, not a link
A QR code delivered as an image in the email body is accessible offline and without a specific app. A QR code delivered as a link requires the attendee to click through to a page, which requires cell signal or WiFi — not reliable in large convention venues. When attendees can't load their QR code at the check-in desk, your staff needs a name-lookup fallback. That fallback slows check-in. Deliver QR codes as images.
Pre-event reminder with QR code re-send
Send a pre-event reminder email 24–48 hours before the conference that includes the QR code again ("Here's your check-in QR code — screenshot it before you leave for the venue"). This reminder reduces the percentage of attendees who arrive without their code. One email reminder at the right time can meaningfully change your check-in throughput.
Pre-Event Data Management
Lock your attendee list 24–48 hours before the event
Set a hard registration cutoff after which new registrations go to a will-call queue or manual processing workflow rather than entering the main attendee list. This cutoff allows you to pre-print badges accurately and give your check-in team a finalized list without last-minute additions creating discrepancies.
Communicate the registration deadline clearly in advance. If you accept walk-ins, have a separate pricing structure and workflow for them — don't integrate them into the pre-registered flow.
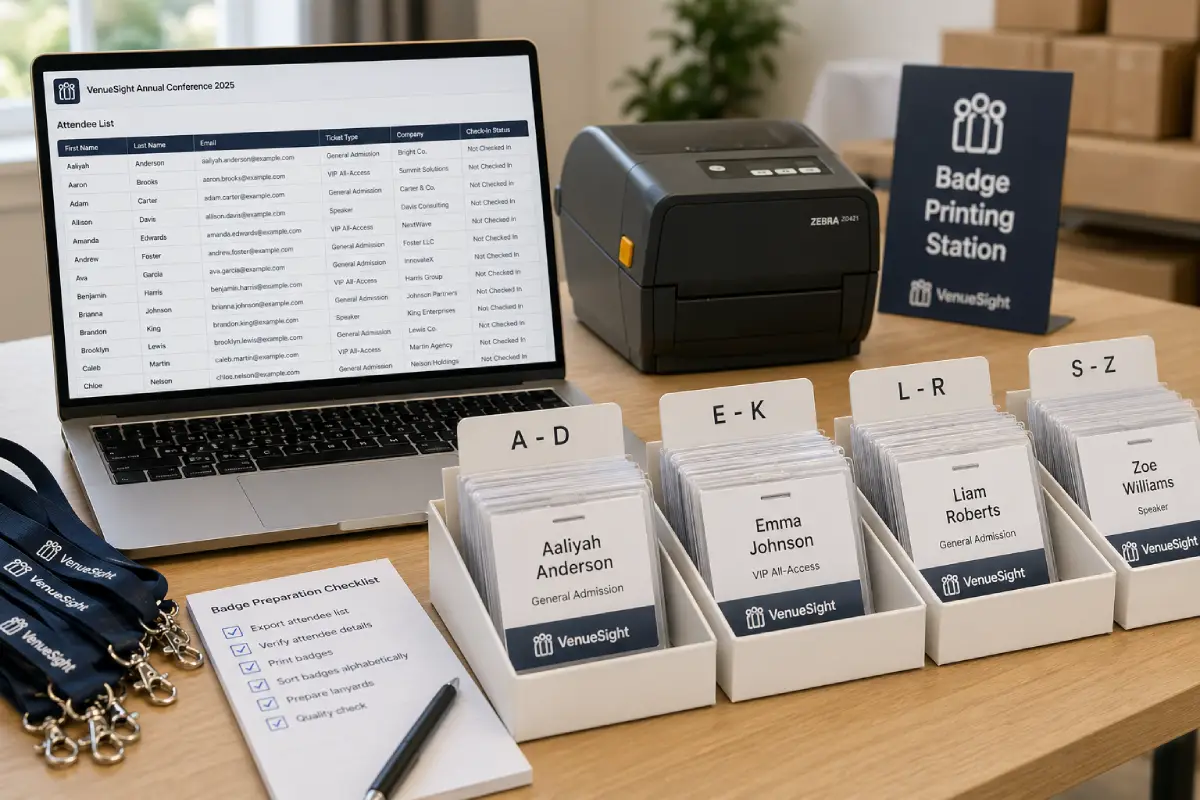
Run a data quality pass before printing badges
Before badge printing, review your attendee data for common issues:
- Names in ALL CAPS (a registration system formatting artifact)
- Names with email addresses in the name field
- Names with placeholder text ("test," "attendee," "TBD")
- Missing required fields that were submitted blank
- Duplicate registrations (same email, different names; same name, different emails)
- Unusually long names that will overflow badge formatting
A 30-minute data review before printing saves you from badge reprint requests at the check-in desk — the worst possible time to discover data quality issues.
Segment your communication list from your operational list
Your attendee list for check-in and badging is your operational list — it should be clean and current, containing only active, confirmed registrations.
Your marketing communication list may include waitlisted attendees, canceled registrations being targeted for win-back, or contacts from prior years. Keep these separate. A segmentation error that sends an event reminder to someone who canceled their registration creates a support request and a poor experience.
Managing Walk-ins and Late Registrations
Walk-ins — attendees who register on-site — are operationally disruptive when handled at primary check-in stations. The correct approach is a dedicated walk-in station with its own workflow:
- Walk-in completes registration on a provided device (tablet or laptop)
- Payment is processed at the station
- A temporary badge is printed immediately so the attendee can proceed
- A final badge is printed and available for pickup within an hour
Walk-in pricing should be higher than pre-registration pricing. This compensates for the operational overhead and incentivizes pre-registration behavior.
For events with significant expected walk-in volume, staff a dedicated walk-in station from the moment check-in opens — not as an add-on staffed when someone shows up needing it.
Badge Printing: How Registration Data Affects Quality
Badge quality depends entirely on registration data quality. Issues in your registration data appear on your badges at scale.
Line length. Badge templates have a maximum character count for each field. Names like "Bartholomew Schwarzenberger" don't fit on the same badge layout as "Lee Kim." Either design badge templates with conservative line lengths that accommodate longer names, or run a character count filter on your registration data before printing to flag names that will overflow.
Company field variations. If registration didn't enforce a controlled vocabulary for company name, you'll have "Google," "Google LLC," "Google, Inc.," "google," and "GOOGLE" as separate entries in your data. Normalize major employer names before printing if accuracy matters for your audience.
Missing fields. If your badge template includes job title and an attendee didn't provide one, the badge either prints with a blank line or an error depending on your printing software. Decide how to handle missing fields before printing — substituting a default value, leaving the field blank, or flagging for review.
For a detailed look at how the check-in process connects to badge printing, see our guide on conference check-in operations.
Registration Data for Post-Event Reporting
Registration data doesn't lose value when the event closes — it's the foundation of your post-event reporting and your planning for the following year.
Actual vs. registered attendance. Your attendance figure for sponsor reports, board presentations, and year-over-year comparisons should be your checked-in headcount, not your registered total. The gap between registered and attended varies by event type and ranges from 5–30%. Know your event's historical no-show rate and use it to inform future capacity planning.
Ticket type distribution. Which tiers were most popular? Did your VIP tier sell out while General had significant unsold capacity? This informs your pricing and tier structure for the following year.
Session enrollment data. Which sessions were oversubscribed? Which had significant no-show rates despite full pre-registration? This data shapes your speaker selection, room assignments, and session format decisions for future events.
Demographic and company data. If you collected company and title information, this data helps you understand whether your attendee composition matched your target audience profile. It also feeds sponsor reports — sponsors want to know who they were in front of, not just how many people attended.
Running Conference Registration in VenueSight
VenueSight's registration system handles ticket type configuration, session capacity management, promo codes, group registration, and QR code delivery as an integrated workflow. Attendee data flows directly from registration into badge printing and check-in — no export-import loop, no manual data transfer. Session selections sync with the event app so attendees see their schedule in the mobile experience. And your team gets real-time registration counts, session enrollment, and capacity visibility from the organizer dashboard.
If you're setting up registration for an upcoming conference, see how VenueSight handles the full registration workflow or explore the full conference management platform.
Frequently Asked Questions
-
VenueSight handles ticket type configuration, session capacity management, promo codes, group registration, and QR code delivery as one integrated workflow, so attendee data flows directly from registration into badge printing and check-in without a separate export-import step.
-
Yes. VenueSight triggers confirmation and reminder emails automatically with the attendee's QR code included, so registration data is already tied to check-in and badge printing by the time the attendee arrives, with no separate step to generate or attach codes.
-
Yes. Because registration, check-in, and badge printing run on the same VenueSight platform, actual check-in counts, ticket type distribution, and session enrollment are available for post-event reporting without exporting and reconciling data from separate systems.